SketchUp to Photoshop visualization (with plugin)
Export composite images form SketchUp
When working in SketchUp, often we want to quickly share a visualization of what we’re working on, without having to use Layout (SketchUp own publishing tool) nor a rendering software.
The lazy method
An easy but suboptimal solution is to use File > Export > 2D Graphic as-is.
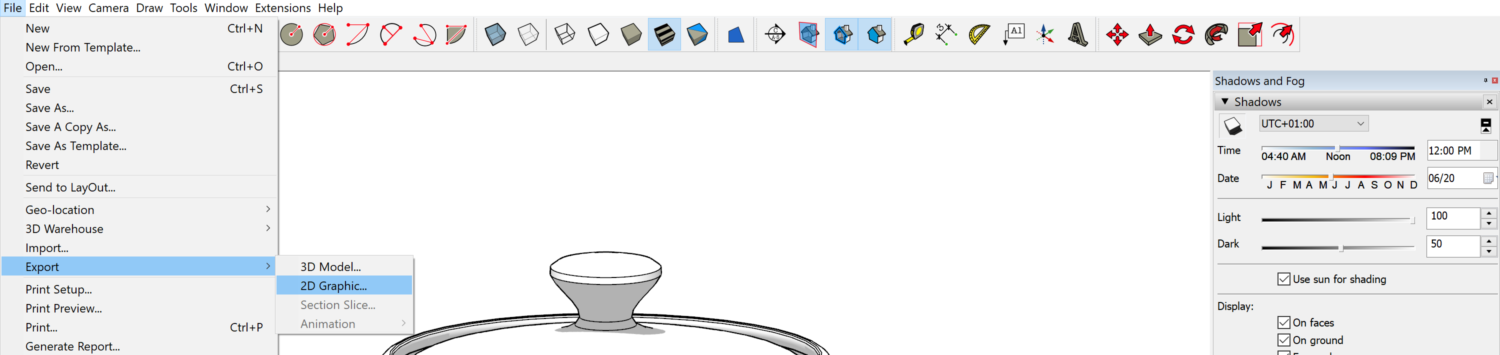
[Export > 2D Graphic option in the SketchUp interface]
This approach is quick but limited in options. In fact, it grabs the entire viewport content, without distinguishing the different components of the image.
The tedious method
We’d like to export separate maps (fancy term to say images whose data will later use for some manipulation) for edges, profiles, colors & textures, shadows, and maybe ambient occlusion.
Why?
Because with separate maps, we can then do a composition in an image manipulation software like photoshop, having control over the visibility and filtering options of the different elements.
A manual solution is to set different styles that control visibility settings, associate them to scenes, and then hit Export > 2D Graphic one time per scene. If we have multiple scenes, it can quickly grow on us. Moreover shadow settings aren’t saved in styles, so we’d need to check that manually.
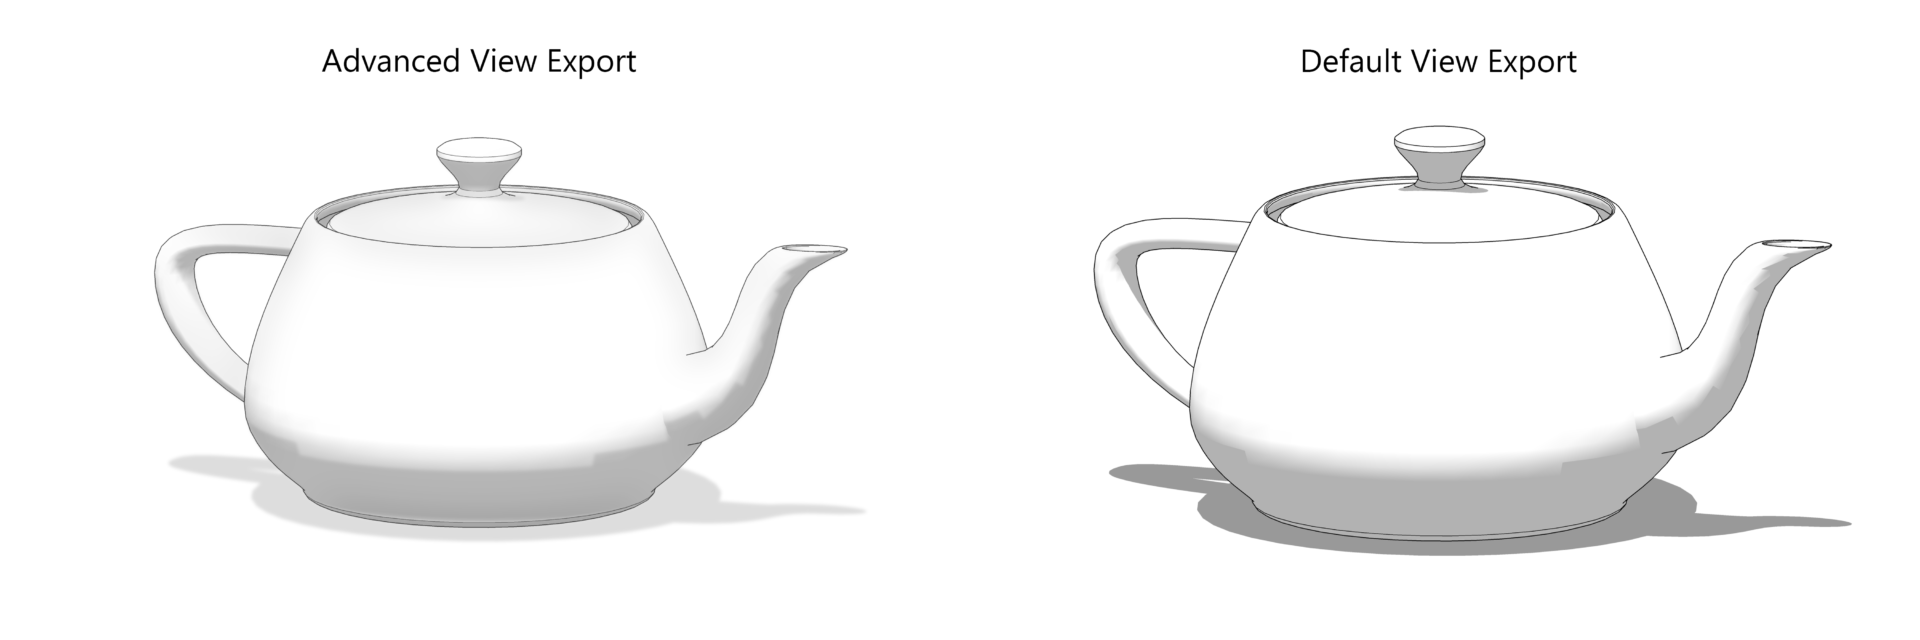
Here is an example of the maps:

- The edges map uses a hidden line style;
- The profiles map is similar to the edges one but has only a thicker outline of the model pieces;
- The colors map has only the materials assigned in SketchUp;
- The shadows map is based on the hidden line but without edges, and of course shadows active;
- The ambient occlusion map is actually a fake trick, that uses 10px thick edges that will be blurred to give three-dimensionality to the image;
- The boolean map serves as a filter to tell the compositing software where the model is or isn’t.
You can download the SketchUp’s styles here.
The combination of the maps in photoshop gives this result; here a comparison with the default SketchUp export:
The lazy man with the plugin method
There’s a better and faster solution: writing a plugin making use of the good old SketchUp Ruby API!
Don’t worry. You won’t have to do that on your own. I did that for you!
In fact, you can click here and check out the free and open-source plugin on my GitHub profile.
And here is the link to the extension on the Sketchup Extensions Wharehouse.
In a nutshell what the plugin does, is what I described in the tedious method, only it takes a few seconds to elaborate, instead of minutes. For those who are eager to know more, the next paragraph will explain how to use the plugin.
How to use the plugin
To activate click on Extensions > Mattia Bressanelli > Advanced View Export. The following dialog will pop out:
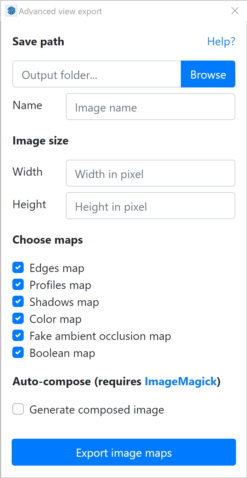
You are presented with four sections:
Save path: choose the folder you want the images to be exported into, and set a name for the image;
Image size: set width and height in pixels;
Choose maps: pick the maps you need;
Auto-compose: check if you want the plugin to do the composition of the maps selected in the previous section automatically, leaving you with the final image only (this option requires you have ImageMagick installed on your computer). If you leave this option unchecked, you will find the separate maps you selected in the previous section, so you can manually compose them in the image manipulation software of your choice.
Useful references
- SketchUp API | https://ruby.sketchup.com/index.html
Credits
- The evergreen Utah teapot, introduced by Martin Newell in 1975 | https://en.wikipedia.org/wiki/Martin_Newell_(computer_scientist)
Mattia Bressanelli
Let me know if the extension works for you, and how it can be improved.
Is it to much to ask if you could add a map with the option/style “Color by layer”?. It will help with post-production as much as the other maps.
Nice plugin regardless
It’s a good point. I didn’t think about it. I’ll definitely add it as soon as I find some spare time, probably next month.
Thanks.
Hi, that’s really interesting, I used in the past the similar method by exporting style by style the same view in order to compose it on Gimp to get a better visualization. I would like to use the function autocompose, but it doesn’t work properly : after I have installed ImageMagick and run the plugin choosing “generate composing image” it seems that something happens, on my screen quickly appears and disappears few terminal windows but when it seems all done there is no composed image in the folder selected. How can i do? thanks
Hi, I made some tests on my install. It works fine with my setup. I’m using Sketchup 2021 updated to the latest release and ImageMagick version 7.0.9-Q16.
The popping of terminal windows is to be expected and suggests that your install is working.
I don’t really know why it’s not saving the image.
The only thing I can think of with the information you gave me is that maybe you have a space in the path you’re trying to save to, like “C:/name surname/folder”. Apparently, ImageMagick doesn’t like it.
Could this extension also export to PDF? Could it also export multiple scenes at once?
Hi Alex.
At the current stage of development, the answer is no. I’m not sure about PDF, the “multiple scenes at once” feature can be implemented, I can’t do it right now though, it was the next thing I planned to add but I didn’t do it yet.
good
Mr. Bressanelli
Thank you very much for this very useful extension.
It is very useful.
If you modify it, I would be very grateful if you could also add the following settings
The output folder is saved in the same directory as the model file by default.
The output name is set to the same name as the current file name by default.
The output size of the image is set to the default image output size.
This eliminates the need to enter a numerical value each time.
I hope it improves and gets even better!
Translated with http://www.DeepL.com/Translator (free version)