Linux Radiance on Windows with WSL and X11
Use Radiance at its best.
The LBNL Radiance software suite is a set of individual command-line executables, developed for UNIX systems, like Linux.
Although there is a Windows version of it, it’s not complete of all the executables, it doesn’t exploit multiple-core CPUs, the executables that exist are limited in some functionality (tensor-tree BSDFs for example), most of the graphical output that originally exploits X11 has no Windows counterpart.
On the other hand, Windows is the OS that supports CAD applications that create the input files for the Radiance engine.
We would like to use both at the same time, and turn out we can.
Now, I’m not talking about using a full Linux GUI in a virtual machine like Hyper-V. That works, but it’s not good to pass data back and forth from Windows, and it’s fairly hardware intensive, especially on laptops.
Luckily there is a lightweight solution that comes in the form of WSL (Windows Subsystem for Linux), a virtualization environment that puts the Linux terminal in the Windows command prompt, without carrying all the unnecessary UI which we wouldn’t use anyway.
Windows Subsystem for Linux (WSL)
To use WSL you need a Windows 10 device, updated to at least Update 1709 for version 1, and Update 2004 for version 2. Both of them will do the job for us, I’m using version 2 because it performs better.
The steps to install it are:
- Enable the “Virtual Machine Platform” optional component, by checking the corresponding box in the “Turn Windows features on or off” options panel;
- In the same panel enable “Windows Subsystem for Linux”;
- Hit “OK” at the bottom of the panel and let Windows do its things;

- Reboot the computer;
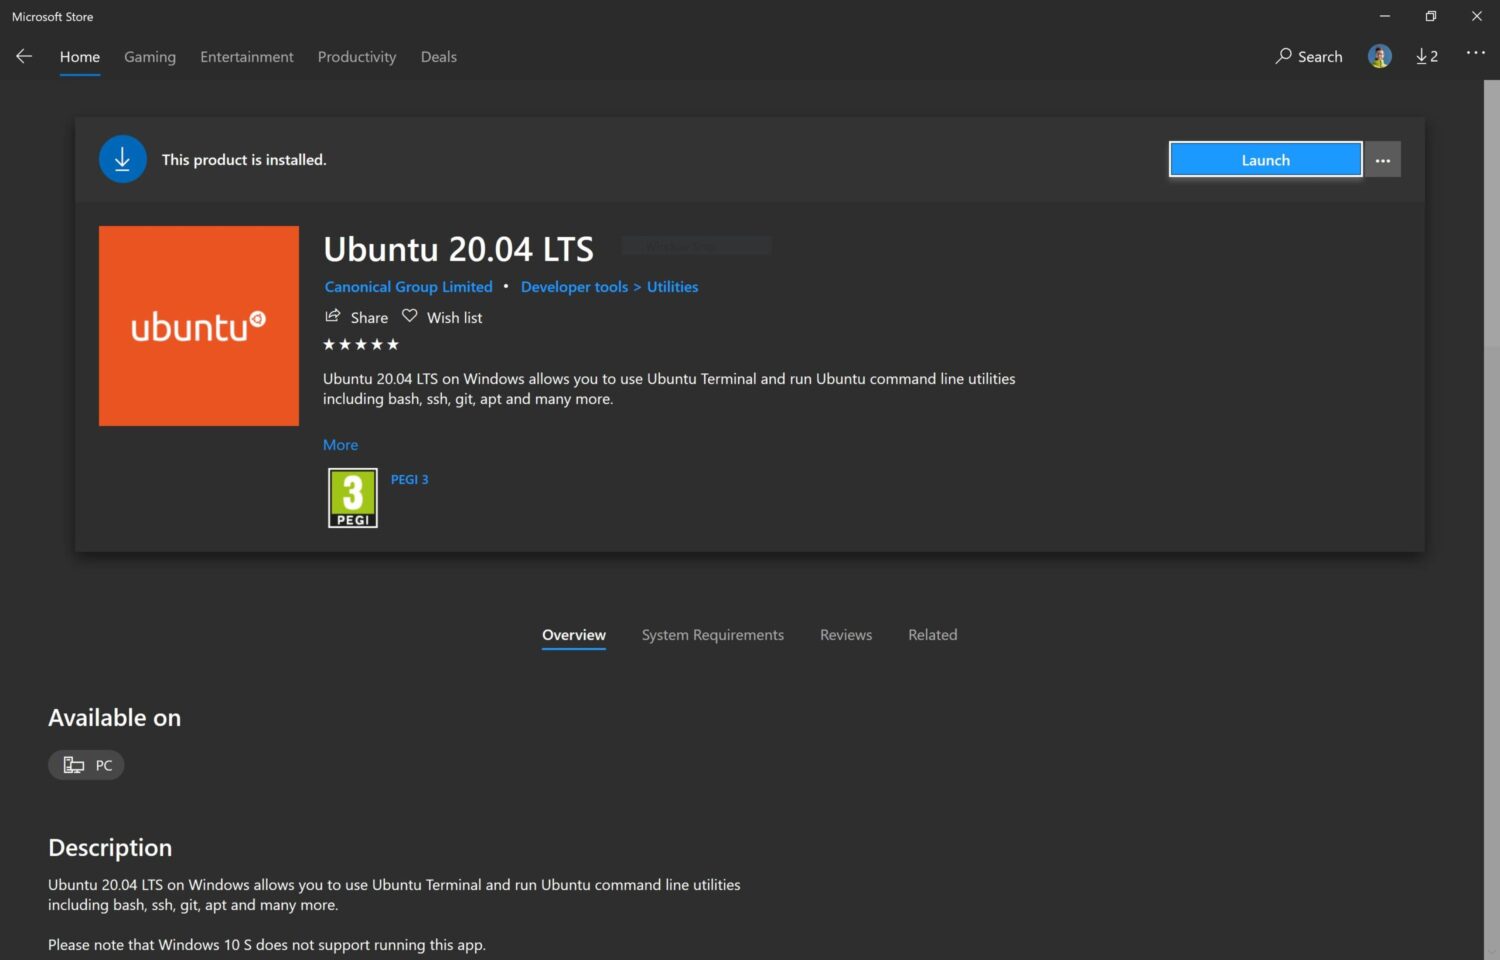
- Go to the Windows Store and download a Linux distribution. I’ll use Ubuntu 20.04 LTS, the latest Ubuntu version at the time of writing.

- Launch Ubuntu by clicking “Launch” in the Store, or by searching for it in the Start menu. This will open a Windows command prompt which will install WSL.
- You may get an error stating “WSL 2 requires an update to its kernel component…”. To fix it follow the link https://docs.microsoft.com/en-us/windows/wsl/wsl2-kernel, download the update .msi file and execute it; Repeat previous step.
- When the install is finished you’ll be prompted to create a default UNIX account (a username and a password). Note that the password won’t be displayed while you type it, but will be registered on “Enter”.
- You’re done. To run WSL in the future simply search for Ubuntu in the Start menu, or open the command prompt and write “bash” and then hit “Enter”.
To check if everything is working you can open the Power Shell and write the command wsl -l -v. This will list the existing WSL virtual machines, along with their state (running or not running) and the WSL version (1 or 2). If the machine you’re running is version 1, but you what version 2 type the command wsl --set-version NameOfTheMachine 2. You can also set version 2 as a default for new machines with the command wsl --set-default-version 2.
Radiance for Linux
It’s time to get the Linux version of Radiance. Doing so is very easy since NREL keeps a GitHub repo where you can download precompiled binaries (here is the link of the official version at the time of writing).
EDIT: if some executables of the precompiled binaries end up not working at the end of the process, build Radiance from source as explained here.
After downloading extract the folder somewhere you want. Here is the directory tree you’ll see:
--- radiance-5.2.dd0f8e38a7-Linux/usr/local/radiance
------ bin
# the radiance suite of software
------ lib
# library files
------ man
# manual files
What we want to do is to move these three child folders (bin, lib, and man) into the WSL environment; I suggest putting them in usr/local/radiance.
To do that:
- Move the “radiance” folder (the one containing “bin”, “lib”, and “man”) to the Desktop (it’s optional, you just need to know where it is saved).
- Locate the “radiance” folder in the Windows environment. In my case, I put it on the Desktop (
C:\Users\<your_username>\Desktop). - Open the terminal in WSL as explained before (open cmd, write “bash” and hit “Enter”).
- You can move to the Windows location in which you have the radiance files to be copied with
cd mnt/c/Users/<your_username>/Desktop - Check if the “radiance” folder is there: write
lsand you’ll see a list of the directories on your Desktop. - Go back to the root with
cd /
- (these two are the only strictly necessary steps)
- To copy the files write
sudo cp -r /mnt/c/Users/<your_username>/Desktop/radiance /usr/local(sudomeans as admin,cpmeans copy,-rmeans recursively [all files and folders within the parent]) - Enter your Linux password.
- Check if the “radiance” folder has been successfully copied with
cd /usr/localand thenls - You’re done.
To let Ubuntu understand the name of the Radiance commands, we need to add the newly installed folders to the environment variables (similar to the path in Windows if you are familiar with it).
To do that open the wls terminal and use the commands:
export PATH=$PATH:.:/usr/local/radiance/bin
export RAYPATH=.:/usr/local/radiance/lib
To test if the installation is working type the command genbox. If you are prompted with the suggestion Usage: genbox material name xsize ysize zsize [-i] [-b bevel | -r rounde], Radiance is installed correctly.
X Window System (X11)
You’ll notice that there are a set of commands that are named xSomething. If you try to call them, they won’t work. The reason is that they are based on a windowing system called X Window, which neither Windows nor WSL Ubuntu comes with. But there’s a solution!
The xSomething software are the ones that need a GUI to output results. To make them work we simply install VcXsrv (that can be downloaded here). After running the installer launch the XLaunch software, leaving all options to default, except in the “Extra settings” tab check “Disable access control”.

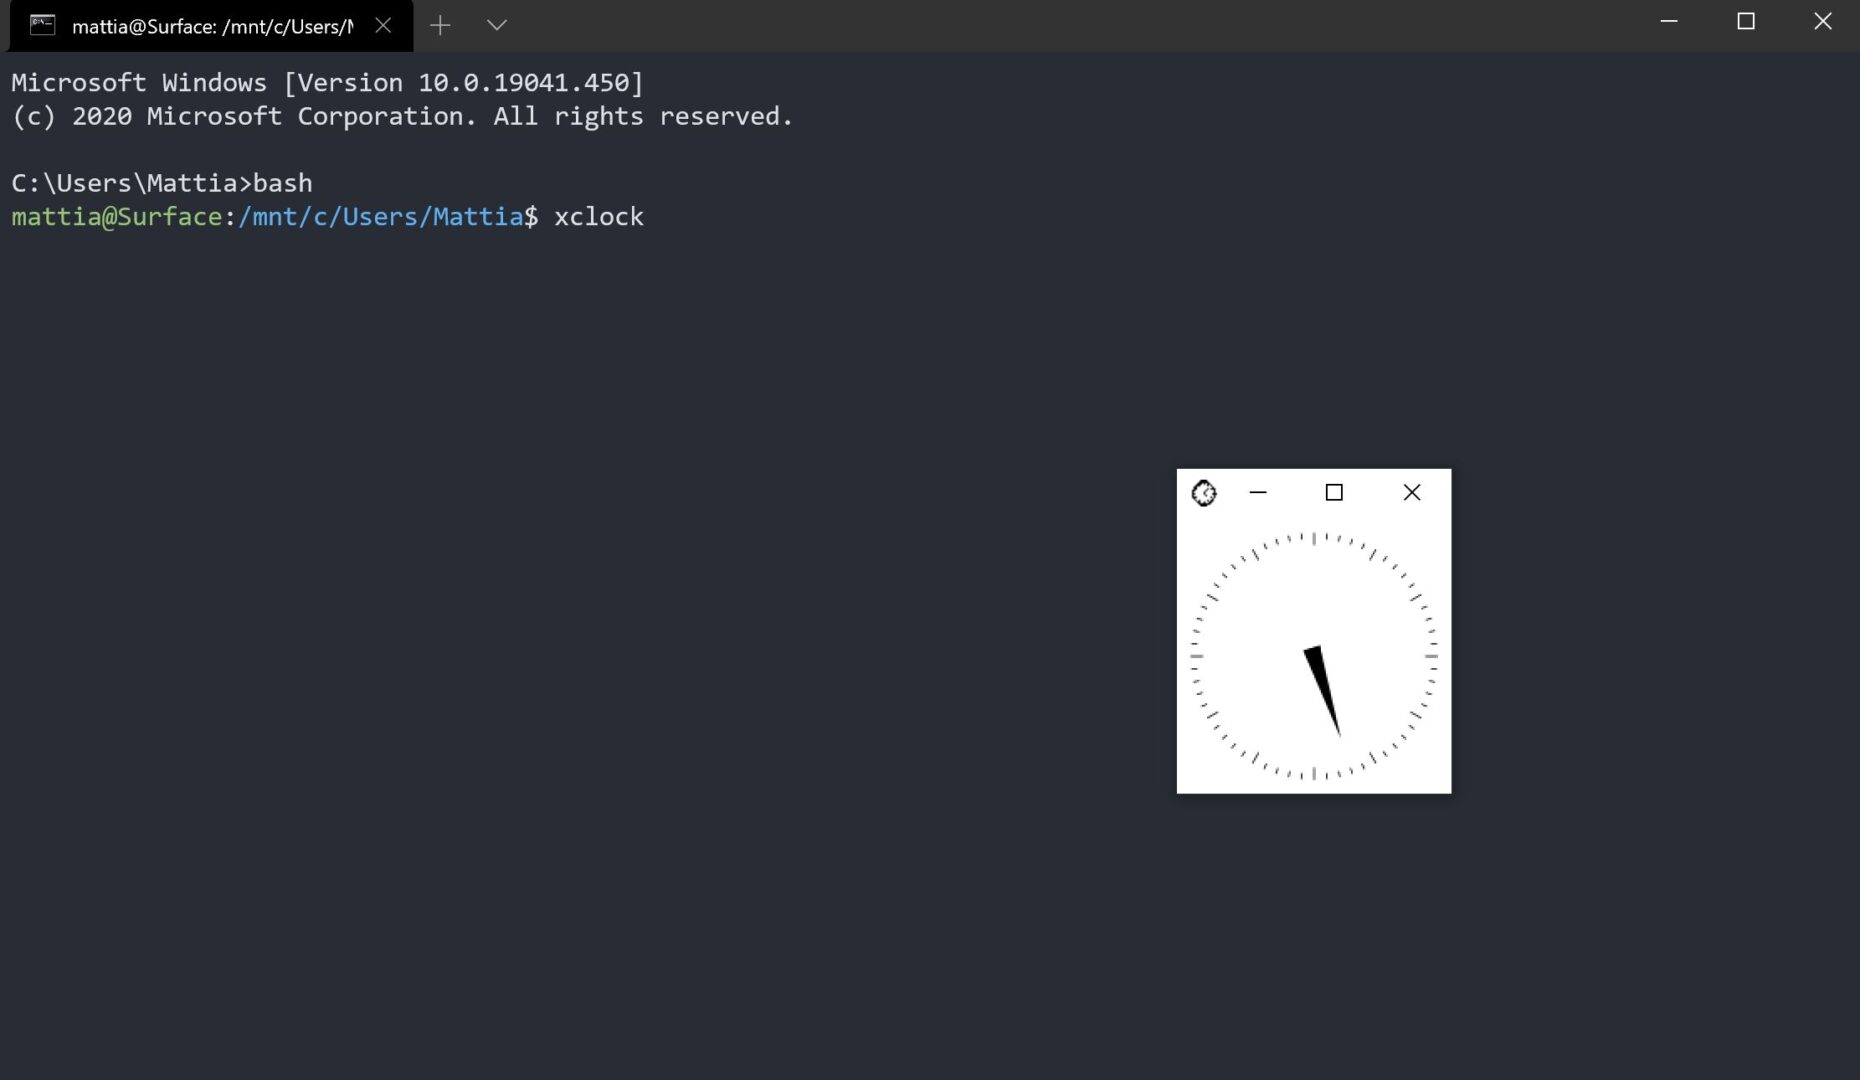
To quickly check if the install is working open the bash terminal and write the xclock command, if an old looking clock comes up, it is.

Note that you’ll need to run XLaunch every time you want to use x11 software from the Radiance package.
Conclusions
You’re set to go! Now you can exploit the full power of Radiance like in its native environment.
Useful references
- WSL Documentation | https://docs.microsoft.com/en-us/windows/wsl/
- Windows 10 releases | https://docs.microsoft.com/en-us/windows/release-information/
- LBNL Radiance website | https://www.radiance-online.org/
- X Window System (X11) | https://en.wikipedia.org/wiki/X_Window_System
Mattia Bressanelli
Thanks for the tutorial! I just started using Radiance this semester and this saved me time getting it set up in WSL 😀
I have successfully installed the Ubuntu 20.04 LTS. but I could not install radiance in Linux distribution environment. could you please explain the procedure to move bin, lib, and man folders into WSL environment more clearly? I tried several times but failed. thanks in advance for your kind help.
I added a checklist on how to move the folders in WSL to the desired location. The key takeout is that you need to access the Windows environment from WLS in order to have permission to copy or move the files in it.
@ Mattia thank you so much. it is working now. but after installation of X11 following your instruction, when I tested it using xclock, it shows “error: can’t open display:”. how to fix it? could you please help me to fix this problen.
– is XLaunch opened while you try to use xclock (or other xcommands)? It has to stay open, it’s a virtual server, you need to be connected to it while you’re using it. Having it installed isn’t enough [just to be sure, I don’t think this is the problem];
– given the error message, VcXsrv is probably pointing to the wrong display. When you open xLaunch, the first dialog will ask you to “Select display settings”. What is the “Display number” option set to? Mine is “-1” so that it selects the display automatically, maybe by default is “0”.
Thank you so much for your detail explanation. I have successfully copied the radiance folder in Linux and check it using ls command. I also executed both export command in wsl terminal. But during test, it didn’t behave like your statement. I don’t know how to handle this problem.
I read you fixed it, great! Probably required a restart to sink in the export settings.
Great explanations! had to google how to unzip the tars in linux but got genbox to work.
still having issues with linux not connecting to xlaunch. any clues? I started it with the “no client” mode an disabled the access control.
fixed by running these two commands
export DISPLAY=$(ip route list default | awk ‘{print $3}’):0
export LIBGL_ALWAYS_INDIRECT=1
//source from https://stackoverflow.com/questions/61110603/how-to-set-up-working-x11-forwarding-on-wsl2
Great!
Hi. It probably has to do with the “DISPLAY” environment variable configuration.
Try to add the following to the “.bashrc” file (it’s a text file you can locate at “~/.bashrc” and open with a text editor of your choice, like vim with “vim ~/.bashrc”, or vscode with “code ~/.bashrc”) in your wsl Linux install:
# set display (this line is just a comment, it’s not necessary)
export DISPLAY=$(awk ‘/nameserver / {print $2; exit}’ /etc/resolv.conf 2>/dev/null):0
export LIBGL_ALWAYS_INDIRECT=1
is there a colon too many in below commands?
export PATH=$PATH:.:/usr/local/radiance/bin
export RAYPATH=.:/usr/local/radiance/lib
this might be needed to add to bashrc:
export PATH=.:/usr/lib/radiance/bin:${PATH}
export PATH=.:/usr/share/radiance/lib:${PATH}
RAYPATH=.:/usr/share/radiance/lib/
export RAYPATH
It looks like “.:/usr” should be “./usr” (but you probably figured it out already if I understand correctly from your subsequent replies).
Just sharing my first impressions here:
im connecting my radiance with ladybug tools. they always use c:\users\myusername\simulation for rad files.
so i created a linux symbolic link (like a shortcut) to this folder.
the base folder in linux is “~” (write cd and enter)..
to access ~/simulation simply use the below command once:
$ ln -s /mnt/c/Users//simulation ~/simulation
now you can always find your ladybug files by typing
$ cd ~/simulation
and if I’m calling the rvu command i get the following error:
error while loading shared libraries: libQt5Widgets.so.5: cannot open shared object file: No such file or directory
which was solved by running
$ sudo apt-get install libqt5gui5
to be able to use objline i get this error:
/usr/local/radiance/bin/objline: /bin/csh: bad interpreter: No such file or directory
it can be solved with
$ sudo apt-get install csh
Thanks for sharing these thoughts.
Hi all,
I had issues on company computer connecting WSL to the internet and also bridging to our network despite various tries to solve it from online guides and help from IT. We ended up for a remote solution to create a Virtual Machine with Hyper V in windows running on port 2222, while the windows-installed OpenSSH (yes it runs on most windows machines!) can still run on the default port 22. This solved the network issues for remote access to our radiance server.
The only caveat at using HyperV over WSL (according to our IT, im by no means an expert….) is that with HyperV you allocate ram instead of share rams. But since our server has plenty it was easy to allocate 64Gb for the linux partition. Havent fully investigated it yet in terms of X11 etc but I will update when I can.
Hi Mattia,
Just a quick note,
The radiance repo you are referring to is outdated and you should use this one instead https://github.com/LBNL-ETA/Radiance/releases
Hi,
thanks for the heads up!
I updated the link in the article.